Shopify is a Canadian e-commerce company headquartered in Ottawa, Ontario, that develops computer software for online stores and retail point-of-sale systems. We built an integration into Shopify’s Payment gateway that allows you to process transactions in your preferred payment method in your Shopify store. Please follow the detailed steps on how to integrate PostFinance Checkout payments into your Shopify backend.
PLEASE NOTE: Shopify has made some changes to its platform. To process payments you need to install the new Shopify payment app.
The following features are no longer available with the new integration:
-
Shopify Subscriptions
-
Integrated Payment Form
-
Refunds, Completions, and Voids should only be triggered from the Shopify backend
To integrate PostFinance Checkout into your Shopify, you have to install the Shopify payment app of your desired payment method.
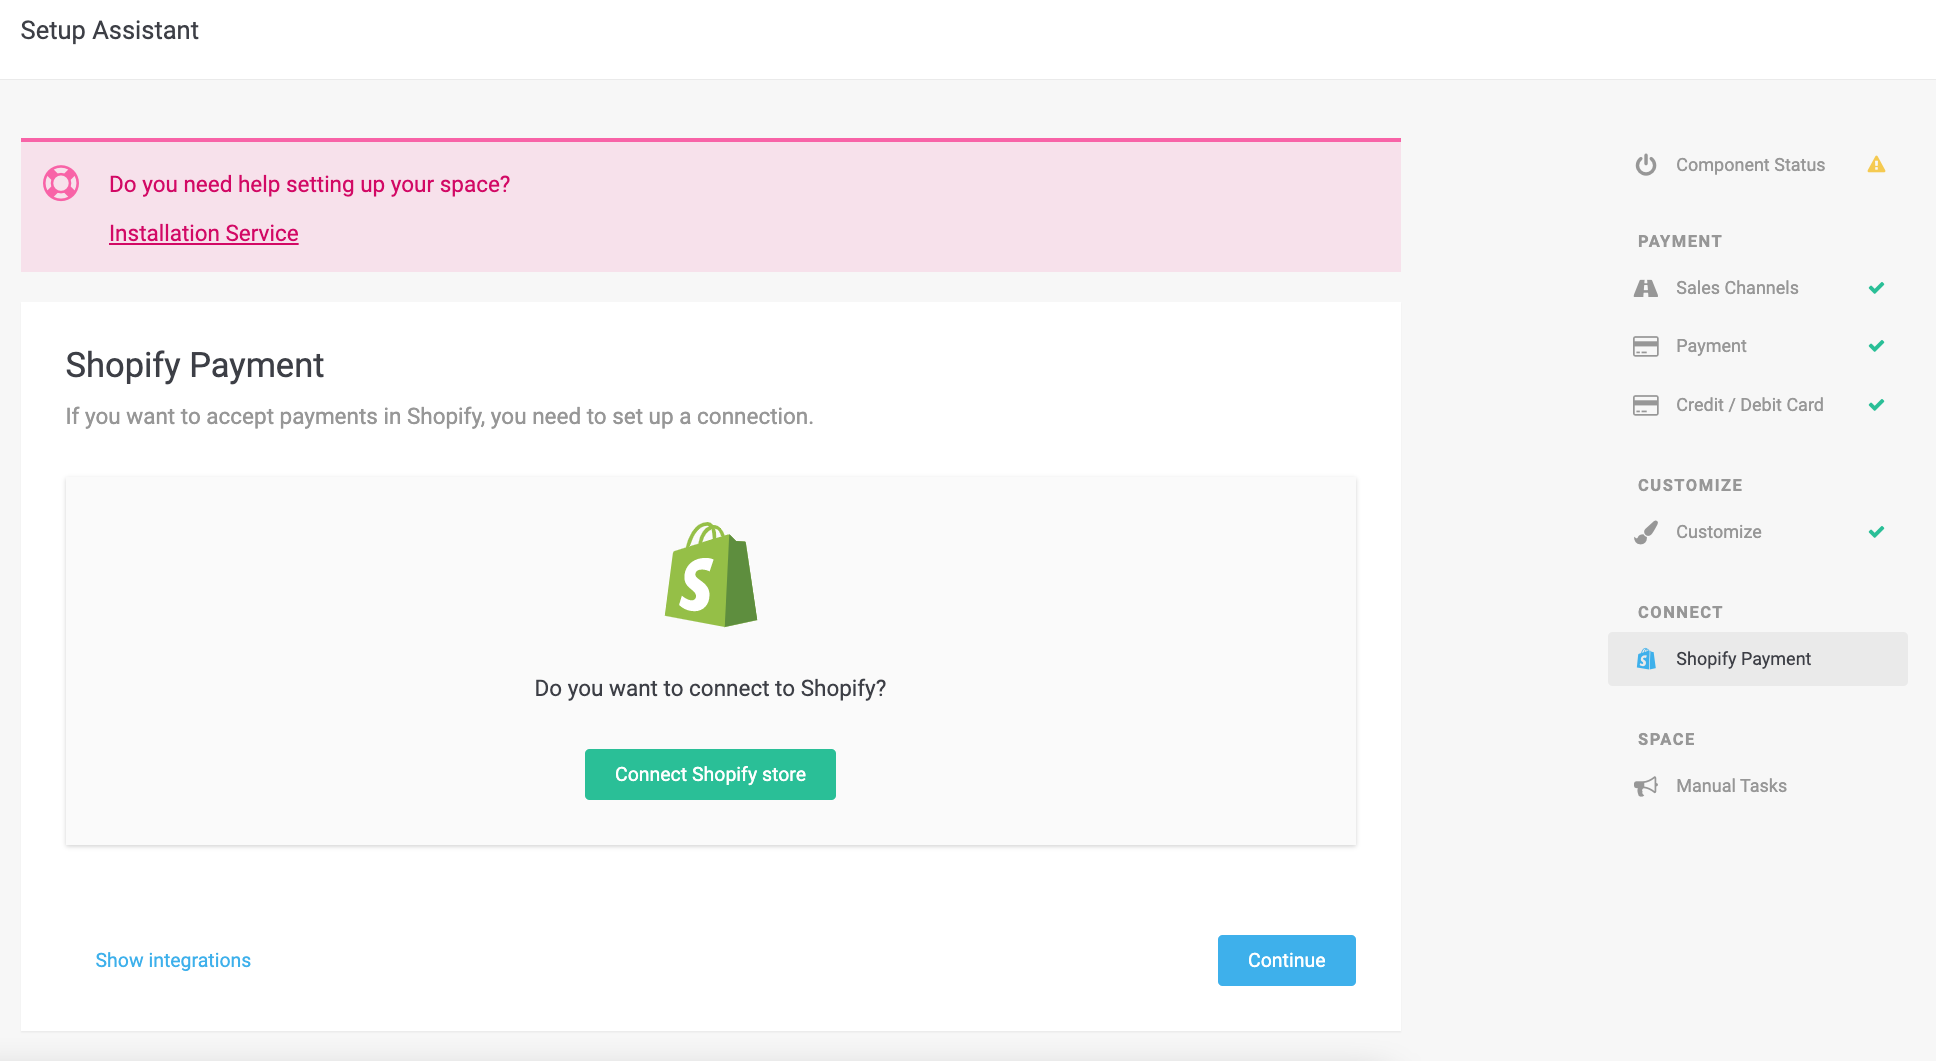
You can connect your Shopify store through the Shopify Payment integration which you can access directly from your space: Space > Settings > Shopify Payment
Figure 1. Use the Shopify Payment Integration to install the payment app and connect the Payment app to your store.
You can navigate to Space > Settings > Shopify Payment, and connect your Shopify store there. Please follow the following steps to complete the installation:
-
Click
Connect Shopify store. -
Choose the preferred payment app and enter your store’s name.
-
You will be redirected to Shopify to install the payment app.
-
Configure and activate the payment app in Shopify.
You can find the payment app also in the list of Shopify’s payment providers when you navigate to your store’s Settings.
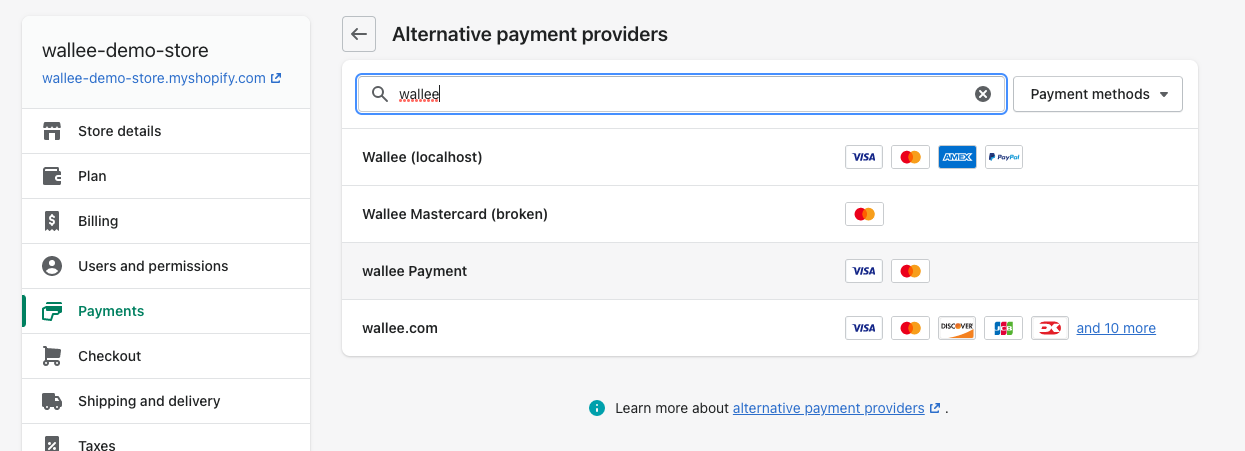
Figure 2. The PostFinance Checkout payment app in Shopify’s list of payment providers.
In order to accept payments over the configured gateway, you have to make sure that you configured your processor, payment method, and connector correctly. Manuals on how the payment processor needs to be configured can be found on the Processor List.
The Payment Process is completely standardized for every payment method you can process. This gives you the ability to simply add a payment method or processor without changes inside your Shopify configuration. An overview of the states and the payment processes can be found in the Payment Documentation.
In the following section, we provide you with an overview of how the transaction states are mapped into the Shopify state graph for orders.

You can capture, cancel and refund transactions directly from within the Shopify backend. Please note if you refund, void, or capture transactions within PostFinance Checkout, the events will NOT be synchronized into Shopify.
You have the possibility for your transactions to have the payment only authorized after the order is placed. In Shopify Settings > Payments you have the option, to define whether the payment should be completed immediately or deferred.

Figure 4. Choose your preferred payment capture method.
To complete a transaction in Shopify, open the order and click on the Capture Payment button.
This will finalize the order, and it can no longer be changed.
|
Note
|
When the completion is pending in PostFinance Checkout, the order will stay in the authorized state in Shopify. |
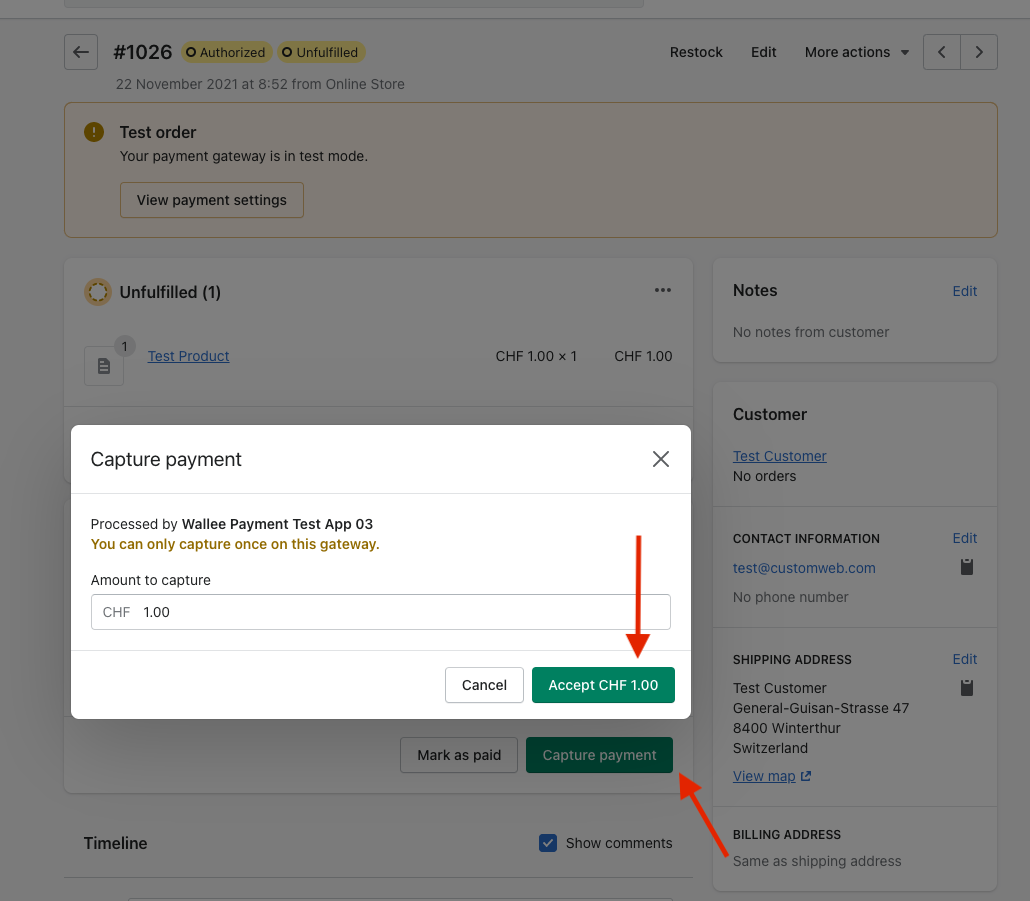
Figure 5. Capture a Transaction.
Deferred Payment Completion
Some retailers only want to authorize transactions and start the fulfillment process once all items are shippable.
This is possible, however, certain processes should be followed. If you have configured payment completion to be deferred, you should capture the transaction before you initiate the shipment,
as it can happen that a completion fails. If you want to be sure that you do not ship items for which you have not been paid, you should postpone the shipment until
the fulfilled state is reached. The transaction will move into the Authorized state in PostFinance Checkout and in Shopify after creation. If you want to start the fulfillment process, make sure you initiate the completion process as described above. Once the completion is successful, the order will switch to the Fulfill state in PostFinance Checkout and to the Paid state in Shopify. You can now start the fulfillment process.
|
Warning
|
The completion of the transaction is only available to be made from the Shopify shop side. Please avoid performing the completion of the transaction from PostFinance Checkout in order to prevent inconsistency. |
In order to void a transaction, click on the More actions button and then on the Cancel order button.
|
Note
|
You can only void transactions that are not yet completed. |

Figure 6. Void a Transaction.
|
Warning
|
The void of the transaction is only available to be made from the Shopify shop side. Please avoid performing the void of the transaction from PostFinance Checkout in order to prevent inconsistency. |
You have the possibility to refund already completed transactions. In order to do so, open the captured order. By clicking on Refund the window for refunds will show.
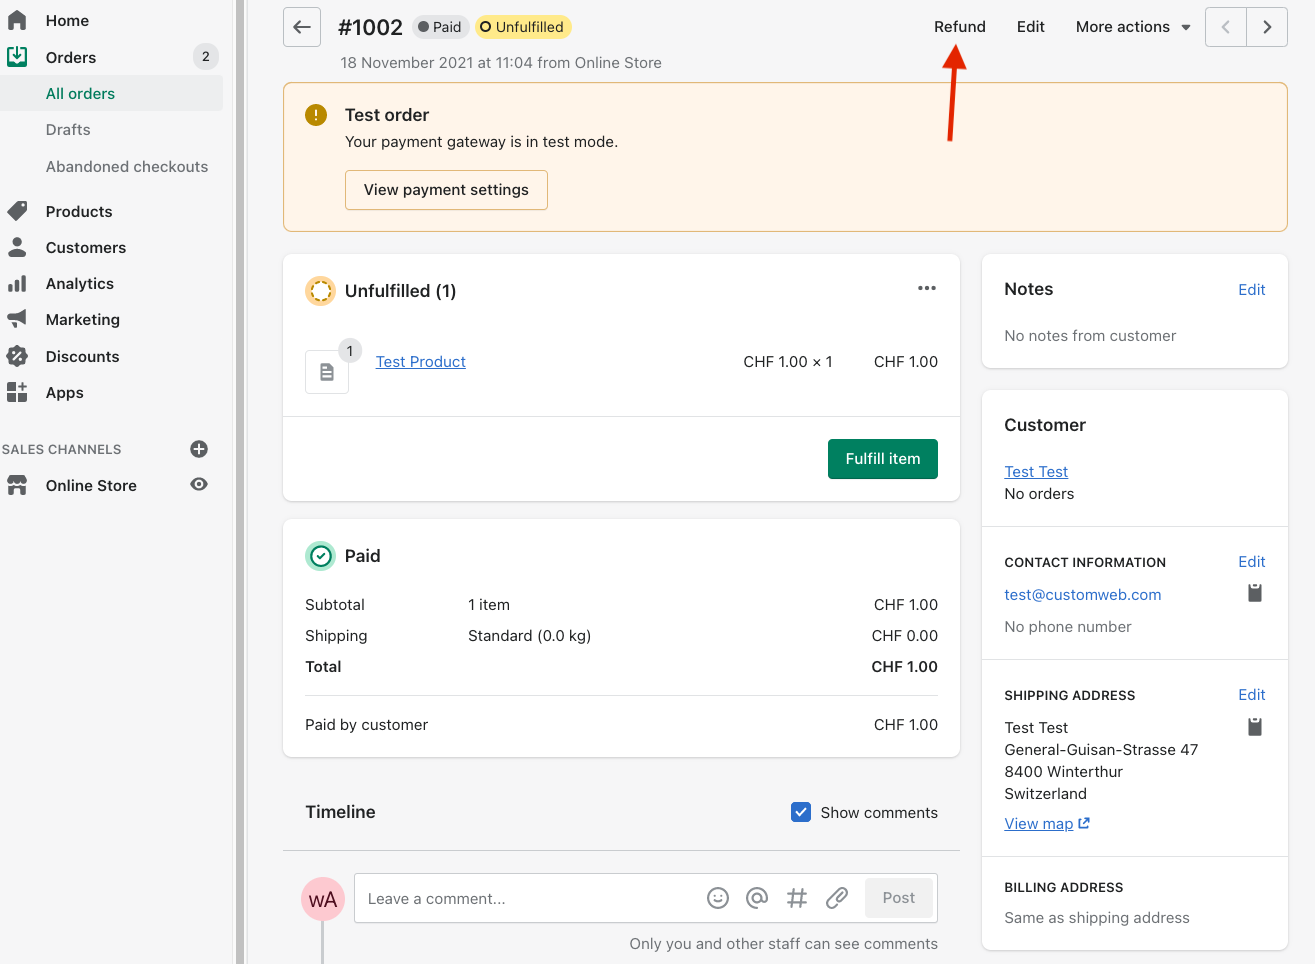
Figure 7. Refund a Transaction.
|
Note
|
Ensure that the connector which processed this payment supports the refund feature. In order to check that have a look at the processor list and check the connector of a processor. |
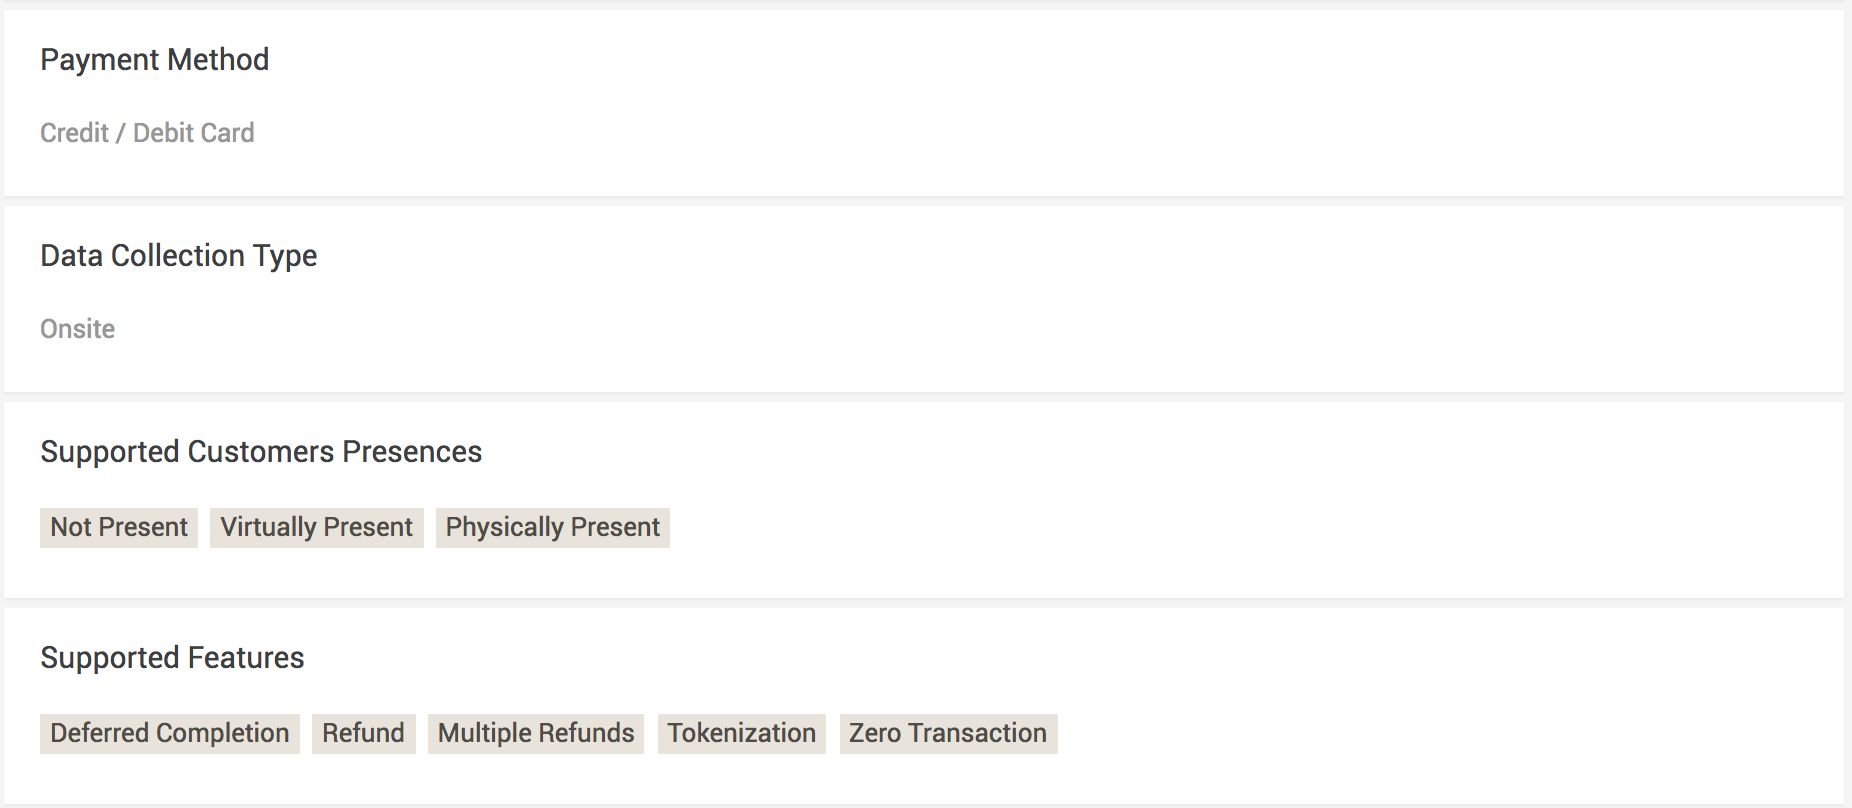
Figure 8. See the example of an AMEX connector that supports Refunds.
You can make refunds based on product quantity. In order to do so, enter the number of products you wish to refund to your customer.
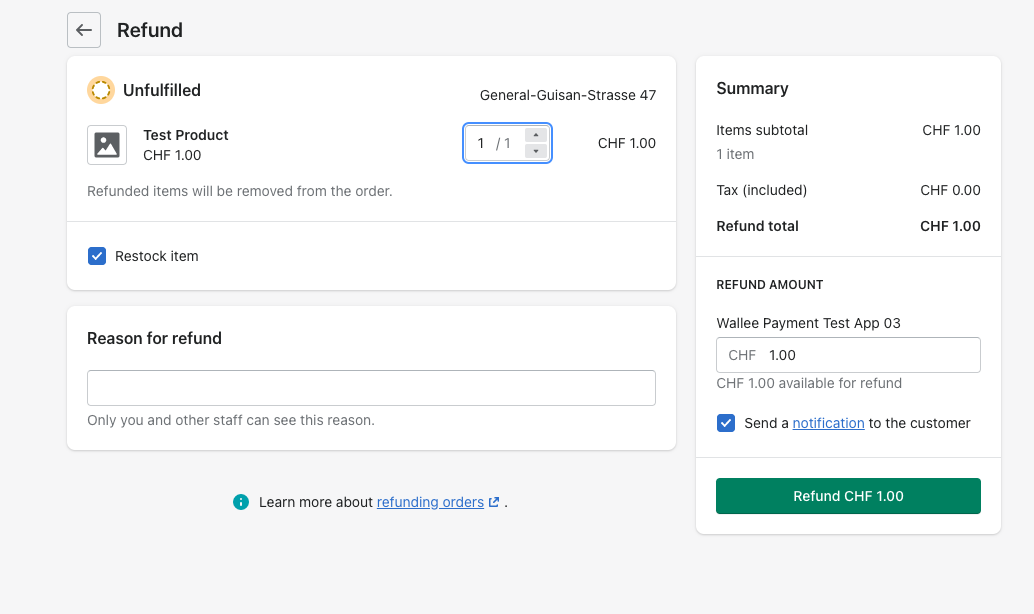
Figure 9. Refund a Transaction.
You can carry out as many individual refunds as you wish until you have reached the quantity of the original order.
|
Note
|
It can take some time until you see the refund in Shopify. Refunds will only be visible once they have been processed successfully by your processor, and if refunds are supported by that processor. |
|
Warning
|
The refund of the transaction is only available to be made from the Shopify shop side. Please avoid performing refunds from PostFinance Checkout in order to prevent inconsistency. |
If a delivery has not been done, the state of the order will be in Authorized. This happens when the transaction has not reached the fulfilled state in PostFinance Checkout yet.
There are essentially two reasons why this can happen:
-
The transaction is not completed. If this is the case, you would have to complete the transaction as described above.
-
We are unable to tell you if you can fulfill the order. The delivery decision is usually made automatically. If this does not happen within the defined time frame, we will generate a manual task which you should observe and follow the instructions.
You can find more information about manual tasks in our Manual Task Documentation.
Our Shopify Payment integration offers now the support of Line Items. To enable them, you just need to install an additional app in your Shopify store and this feature will be added to your shop.
|
Warning
|
Please note that Duties are not supported with the use of the Line Item app. If you would use Duties, please do not install the companion app. |
|
Warning
|
The Line Item app is not compatible with credit card (onsite) Shopify payment app. |