
In order to start processing invoices via MF Group you have to sign a contract with MF Group. You can do that only by contacting MF Group directly using the Contact Form.
Once you signed up for a contract with MF Group you will receive the login details to the Onboarding Portal. Inside the onboarding portal you find the credentials for the test and the live environment.
Once you logged into the Onboarding Portal you will find your test and live credentials. We already configured some test credentials into the system for a general test account. If you want to test the integration you can go ahead to create the connector in the connector wizzard. After the test was successful you can apply for the live credentials.
Once you received the live credentials you can configure the MF Group Processor. You have to switch the Operation Mode into Live Mode. Now you select if you want to process only B2C or also B2C Invoices.
|
Note
|
We decide if an invoice is B2B or only B2C if you provide a company name. On the other hand if you provide a company name and your processor is not configured for B2B the payment method may not be displayed. Please check that you are in possession of the correct credentials for B2B and B2C in case you want to offer both solutions. |
You have the option between monthly invoice delivery where the invoice is sent by MF Group at the end of the months directly to the customer. However, you do also have the option to select immediate delivery. In this case the platform generates an invoice including an ISR payment slip with reference number based on the account information that is returned by MF Group. *This allows you to send the invoice directly to your customer via email or print it directly via a cloud printer.
The immediate delivery is a nice way to directly print the invoice for your shipment and send it in the package to your client. On top of that you have the option to personalize the invoice document easily with the built in resource editor. More information can be found in the document document template section.
When using MF Group PowerPay, your customer must accept MF Group’s Terms and Conditions (T&C) before an invoice purchase can be completed.
You can configure whether the Terms and Conditions are displayed and whether the customer must accept them before completing the purchase.
NOTE: This configuration is disabled by default.
Figure 1. Terms & Conditions configuration
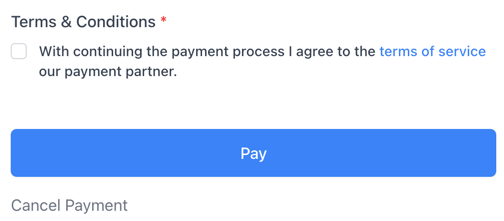
Figure 2. Terms & Conditions checkbox
After you stored the payment information you can create the payment method and connector with the connector wizzard by clicking on Activate. This will create the connector and the payment method.
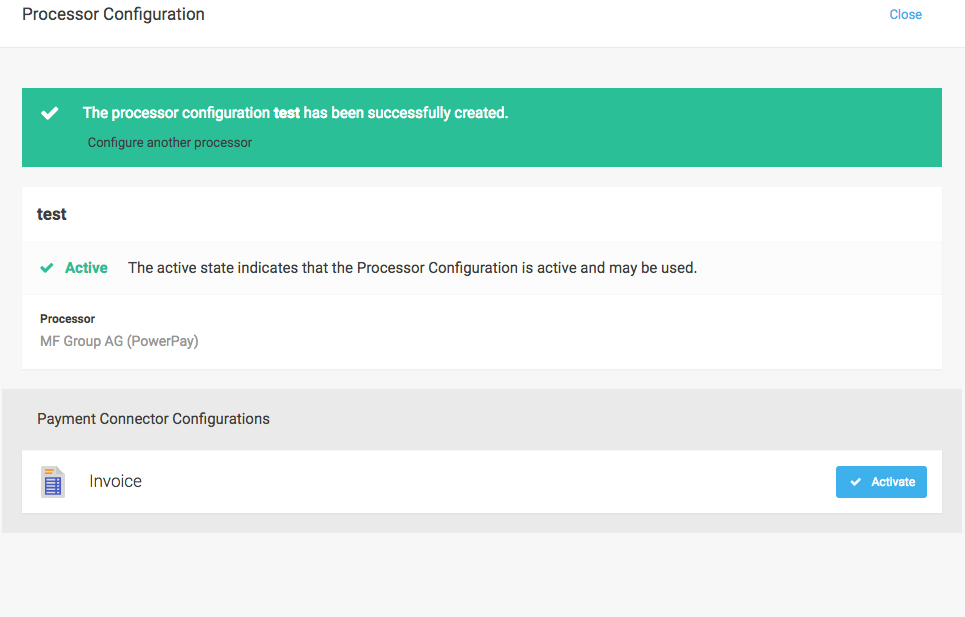
Figure 3. Create the payment method and the connector with the processor wizzard.
Keep in mind that you will have to adapt the payment method description and payment method title as defined in the different languages by MF Group. You find the text inside the Onboarding Portal. Just copy the text and navigate to the payment method settings. Copy the texts for the different languages into the different configuration fields.
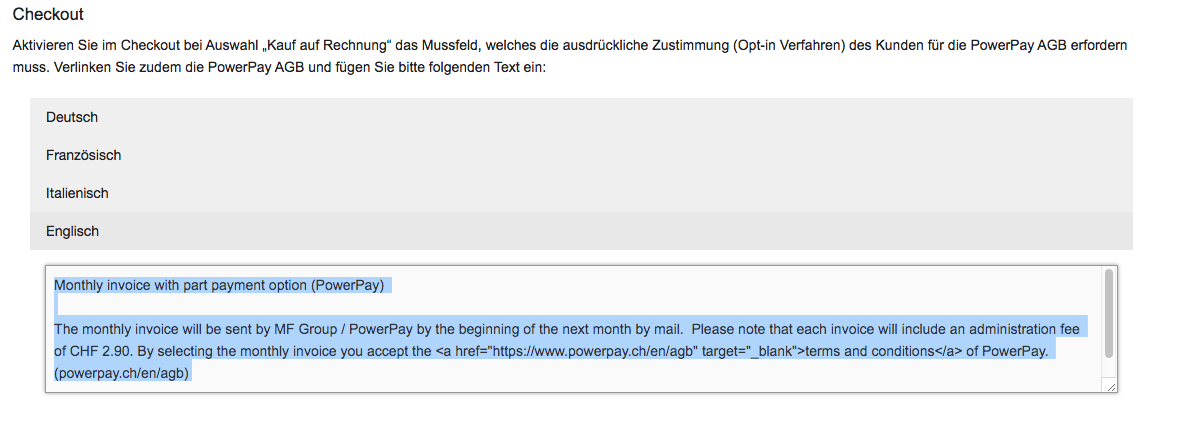
Figure 4. Copy the checkout texts from the Onboarding Portal under Endkundeninformation into your store and make sure that the GTC are updated in your shop.
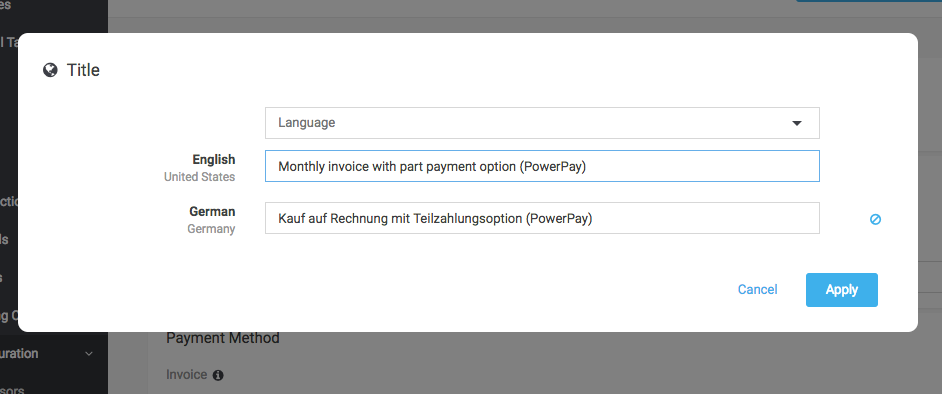
Figure 5. Set the payment methods title and descriptions according the instructions in the Onboarding Portal.